Showing posts with label creative process. Show all posts

Thursday, October 10, 2013

What a Shot Wednesday - Thursday Edition

Today my "What a Shot Wednesday" shot of my own happens to be six shots recently taken in Florence, Oregon. I am debating which, if any, to put in my shop. I am thinking I might put some "collections" in there such as the Florence, Oregon collection and sell them individually and/or in a set (although six seems too many for a set to me). 

Happy for your feedback on this idea and/or which photo you'd like to see for sale in the shop, if you have an opinion. 

As for other great shots to share today, I stumbled across this gorgeous autumn leaf photo by French photographer Kiki Plumier:


http://www.evasionk.be/

Kiki's photo reminds me a bit of this one I took in my office parking lot a while back but different. Water is a never ending source of great reflection photos. And now since this What a Shot Wednesday posting is actually happening on a Thursday (my girl needed great comfort from Mama for an upset stomach), ENJOY! And if you love my autumnal leaf reflection, it will be available in the shop again shortly in this section: https://www.etsy.com/shop/MamaPictureThis?section_id=13522786

Tuesday, October 08, 2013

Tutorial Tuesday - How to turn a photo into a photo canvas

There are tons of ways to turn a beloved photo into a photo canvas. Do a quick google search or two and just see how many you find. My current preferred method is photo transfer and I thought I'd share the process with you one more time since it is TUTORIAL TUESDAY! 

I have searched and tried a few different methods but found my favorite on the "Come on Ilene" blog. I will outline my process here but you may also want to check out here wonderfully simple tutorial here: Make Your Own Canvas Prints.


So far I have made 2" x 3" up to 8" x 10". I'm planning on trying larger canvas sizes but would suggest starting small and moving up in size as you get more comfortable with the process and your results. 

You will need: 
  • Blank canvas
  • Photo printed with a laser printer on regular paper (not photo paper)
  • Gel medium
  • Water spray bottle
  • Foam paint brush
If you aren't a fan of mess, then you should probably cover your work space with a garbage bag (as Ilene suggests) or newspaper or wax paper. Then take your canvas and give it a thick coating of gel medium (I got mine at a local art store called Blick). I would say thick but not TOO thick otherwise in my brief experience, I end up with more air bubbles to push out and glue oozing out the sides. 

Make sure you have cut your image down to the size of your canvas (or maybe just a bit smaller on all sides). When you print, maybe SURE you reverse your image if you want it to appear correctly once you've transferred it to canvas. Of course you may not have to depending on your image, but remember this if you have any wording in your picture or it will be obvious what you did! 


Gently place your image photo side down onto the gel on the canvas and then carefully push out all air bubbles and make sure your image is flat on your canvas. 


Let your project dry for 5 hours to overnight. Then the fun begins! 

Fill your spray bottle with water. Spray your canvas until the paper is saturated and give it a few minutes to soak in. Then you want to start gently rubbing the paper off with your fingers. Be especially careful around key elements of your image so that they don't get rubbed off -- such as faces. You will probably have to do this step multiple times until your image is completely paper free. 


When you are satisfied with your image (and lack of paper on it), allow your canvas to dry thoroughly. Give it a final coat of gel medium and voila -- you have a gorgeous photo canvas! 


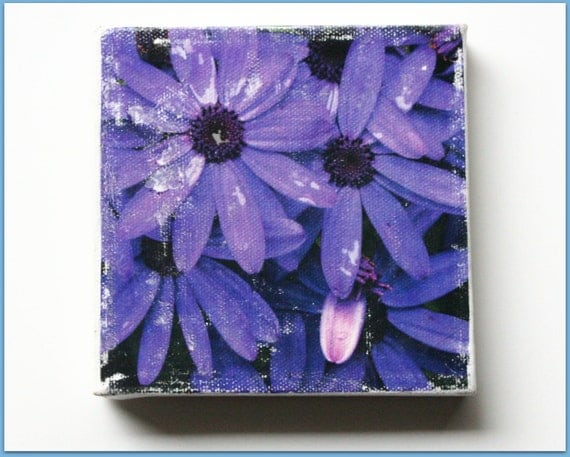
 This one just so happens to be a mini-canvas and is available in my shop 

Floral Mini Canvas - Image of Deep Bright Purple Daisies - Photo Transfer

Saturday, October 05, 2013

Ode to Autumn

It is a gorgeous autumn day in the NW. Sunshine and 71 degrees. I am busy but still wanted to snap a couple shots that remind me of this time of year. I want to go out in search of a lot of differing colored leaves but for now I found these on our in-need-of-repair back deck:

 
And then there's Penny, our rescue dog. Something about her Golden Retriever color just always says autumn to me... but especially when she is falling asleep on the deck in the October sunshine. 

Hope you are enjoying a nice fall nap or some time in the outdoors. 

Ciao for now, 
Mama Zuzi 

Wednesday, September 18, 2013

What a Shot Wednesday - Late Start Edition

Hey there peeps, 

I have gotten out of the every day blogging habit and for that I apologize. I am trying to post more regularly but am not sure just how quickly I can get back to almost every day. 

Luckily today is a "Late Start" day for my children at school which allows me a little extra time at home this morning. It's not only late start Wednesday, but also "What a Shot!" So here is my own "What a Shot": 

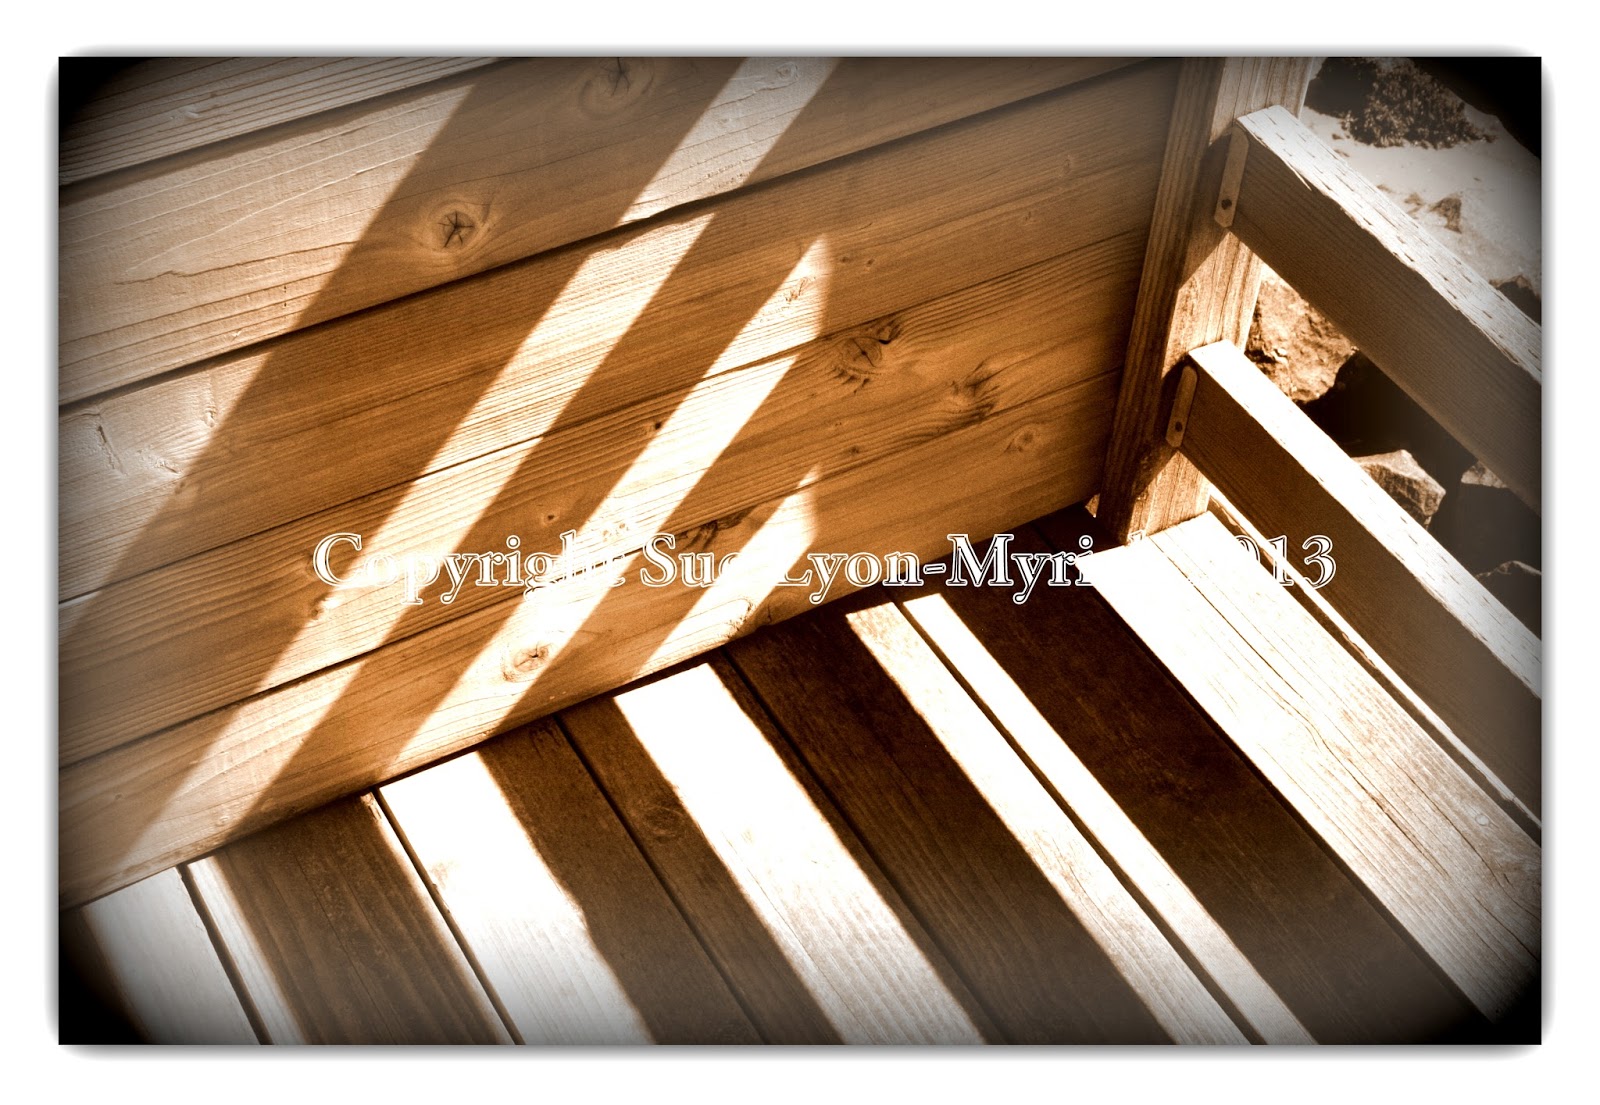
Taken in Florence, Oregon recently, it is one corner of our motel room's deck. I just love finding the beauty in ordinary places and objects. Here a simple wood deck becomes a vision of contrast and warmth, texture and geometric shapes. 

As for other photos I'm loving this week, look at this one I found on Stumbleupon: 
'

It is so serene and gorgeous, I want to be in that boat. 

And check out this shot from Arizona: 


See more amazing shots like this at: http://www.mnn.com/lifestyle/eco-tourism/stories/too-beautiful-to-be-real-16-surreal-landscapes-found-on-earth

Happy Wednesday! Keep finding the beauty that is all around us. 

Monday, September 16, 2013

Happy Monday & A Contest


Please go check out the wonderful My Sweet Savannah blog this week! Today's post includes a giveaway of a Scrabble Tile sign from Mama Picture This! 


Sunday, September 08, 2013

Studio Sunday

There are a few things in the studio as you can see. I have been working on this chicken wire frame display for selling at street fairs and such (thanks to hubby for the help) but unfortunately haven't gotten to use it yet. 

I finally replenished my card and envelope stock and am starting to complete Tammy's order for 14 cards. Considering we drove all the way to Tigard to get to Paper Source (with a parking lot), I should have doubled what I bought -- live and learn. 

The other item in my studio that I need to finish post-haste is a new plaque/sign. Considering adding a few of these (maybe able to be personalized with a photo). This one is Family, but others could be Friendship, Happiness, Believe and the like. What sign would you actually put on your mantel or above your desk? 


I have to complete it and get photos to Melaine over at My Sweet Savannah blog! She'll be giving it away on her blog on the 16th! So mosey on over there and check it out. Maybe you could be the winner! 

More later. Zuzi

Tuesday, August 20, 2013

Pin it to WIN it contest!

Are you on Pinterest? 

Do you like to win prizes? 

This could be your day (or maybe your week)! 

Mama Picture This is having a Pin it to Win it contest on Pinterest. 
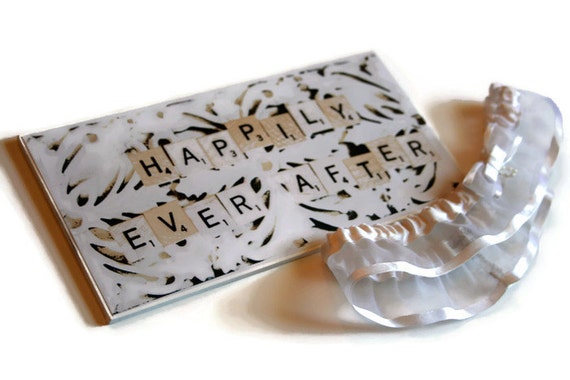
#Repin it to #Win it! Happily Ever After wedding sign for gifting, wedding receptions, photo prop. Winner pulled Friday, August 23, 2013:: 1 entry for each like, comment, and repin. Good luck ♥ #weddings #wedding reception #wedding photo prop #bridal gift
Check it out here:  http://pinterest.com/pin/234820568044291118/


Like it, comment on it, repin it... spread the word. 

Sunday, August 18, 2013

Signs of Sunday

Amazingly my 3 day weekend is all but gone. I did manage some house cleaning, grocery shopping and to cart my children around to today's birthday parties too. 

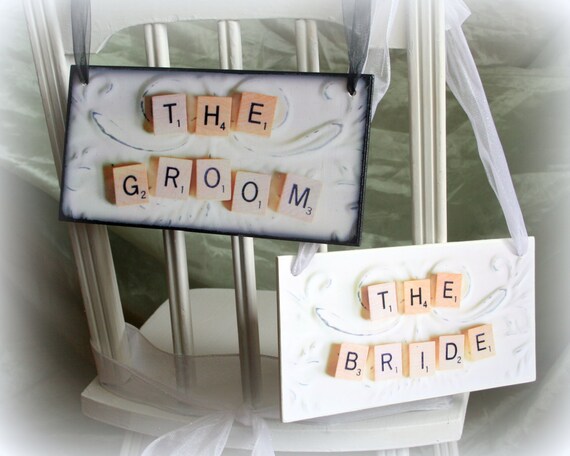
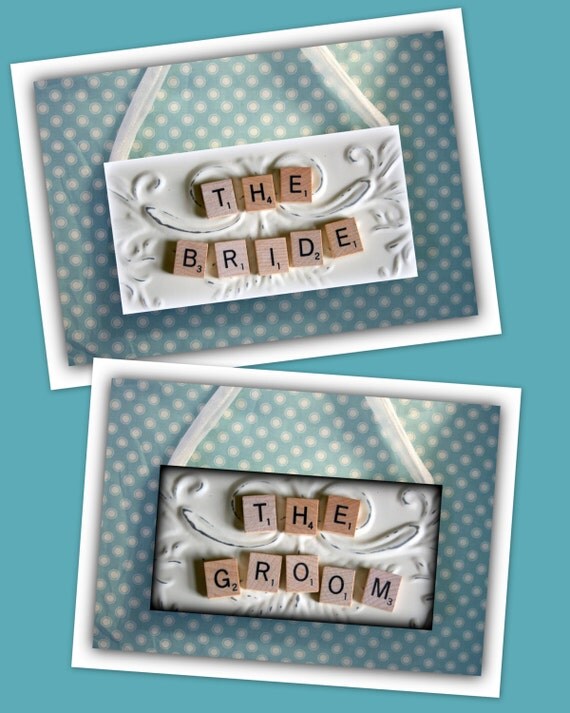
In between I've been playing with signs. I re-did my wedding sign (The Bride & The Groom) listing here: Shabby Chic Wedding Decorations - Shabby Chic Sign Set Victorian Vintage Wedding Reception Sign Set Scrabble


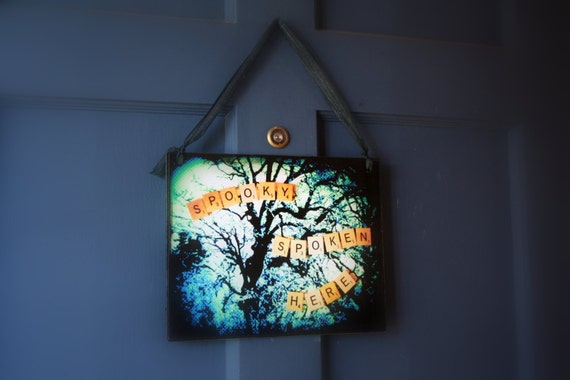
I also finished the first of my Halloween signs today which is now available in the shop and ready to ship: Halloween Decor - Spooky Home Decor Sign - Scrabble - 8"x10"


And last but not least, my current personal favorite that is not yet available in the shop (but could be by special order) -- it is a photo transfer image on a wooden sign board, ready to hang. Could be used at a small business, as home decor or maybe even an intimate wedding: 


And that is what's happening on Sunday for me and "in my shop" too. I hope you had a fabulous weekend. Feel free to fill us in on it by commenting below. Oh and if you are on Pinterest, follow me there! I'll follow you back! I've got a contest going on and I'll fill you in on details tomorrow but you may be able to find it for yourself... a little like a scavenger hunt. 

Friday, August 16, 2013

Scrabble Babble

For the past several months, a big part of my life has been Scrabble (specifically Scrabble tiles). I currently offer several different cards and signs featuring the letter tiles prominently in my photo images in my shop. 


And while sitting here at the computer sipping my iced coffee, I thought I'd take a minute and see what was up with Scrabble? 

I can easily see that people like both the game and the tiles themselves. On home decor blogs (such as one of my favorites My Sweet Savannah and in my local craft store, there are big ones for your walls and smaller ones for many purposes, including necklaces. 

Apparently there's some serious stuff going on out there in the world of Scrabble. 

Facebook, known for it's controversy, seems to be in the thick of one Scrabble story. 

Apparently thousands of Scrabble mobile players have taken to Facebook to complain about changes made to a popular mobile Scrabble app. I noticed at least one Facebook group asking to change it back! Don't mess with Scrabble lovers people! 

The full BBC article is here.

Then there is the somewhat scandalous and sad news that the National Scrabble Association, which helped shepherd the game's public image for decades, has been forced to shut it's doors due to Mattel pulling it's funding and taking it's services in-house. Scrabble players are unsure as to what all this means for national tournaments and more. 

Find the full story here.

And if you don't believe me that Scrabble Tiles (and the game itself) is all the rage these days, check out these home decor ideas featuring what else .... but Scrabble! 

I've got more work to do today with my own Scrabble tiles, so I bid you adieu. 

Mama Picture This (26 points in the game if you were wondering)! 

Tuesday, August 13, 2013

Mama Monday - A Day Behind

The good thing about Summer is all the fun there is to have and all the places to go. We have had a week at the Oregon Coast and this last weekend several days in Bend, Oregon. The problem is however, it throws you right off your normal schedule. 

I have lost my rhythm when it comes to blog posts -- working on getting it back. I hope you will be patient while I get back up to speed. 

The good news about this weekend, besides having fun, was that I got some terrific images that I hope to turn into canvases some time soon. Although at this point they are behind Halloween signs, an order of cards and a wedding sign plus possibly a special custom order. 

Here is a sampling of our Bend experience: 


Of course all good things come to an end and so too will this summer. We still have a few more weeks but as happens every year, I know school is coming when I notice the first purple blooms on what I call the "Back to School" flower ... and look what's in bloom!


What fun have you still got planned?

Whatever it is, enjoy! 

Ciao for now, 
Mama Zuzi (Sue)


Wednesday, August 07, 2013

Waiting on a Wednesday

You may have noticed that I didn't post a tutorial yesterday. Sorry about that but I realized I couldn't actually complete my The Groom and The Bride signs because I needed holes drilled and that is my hubby's job. Hopefully next week will be good to go. 

So now I'm working on some photo transfer projects but here's the thing. First I had to wait to receive my glass and ceramic tile primer. Then I had to wait to get some prints made (my home printer doesn't cut the muster for photo transfers). Then I got a short break when I got to spread a thick layer of the primer on my ceramic plate (see photo) and on a glass plate which goes in a recycled shabby chic photo frame I found the other day at one of my favorite resale shops. 

But guess what? Now I have to wait 24 hours from the time I applied my photo images with a nice layer of gel medium on them to each project... that means I can't start peeling off the paper on my Christmas plate until tomorrow morning right before I go to work AND not until tomorrow evening on the piece of glass. I HATE WAITING!                                                                                                                                        
And so now I'm trying to figure out if I can antique a piece of wood and then photo transfer my Country Door photo onto it (or not)? 

So... while you wait to find out if my projects work, I'm going to go and try to figure out this latest photo transfer question and of course go to bed! 

Ciao for now, 
Mama Zuzi 

Sunday, August 04, 2013

Studio Sunday - It's August Edition

It is indeed Sunday and of course I have some projects I'm working on. To be honest, I have been spending more time today on my computer or at my desk than actually in my studio. 

I have been working on some cards and have listed a couple of new ones for the early birds among us... you know the ones who have all their holiday/Christmas shopping done before we are even ready for Halloween or Back to School! 

I am considering free postage for early bird shoppers who order in August or maybe even September but I haven't decided if I'll do that yet or not.

I need to make a set of signs "The Bride" and "The Groom" for a start but am holding off to see if a couple of other pending orders come in any time soon (or not). I am also working up some Halloween sign ideas and will need to get down in the shop to make those for listing sooner than later. I am already starting to see Etsy sprouting lots of holiday items.

My Halloween projects so far include: 


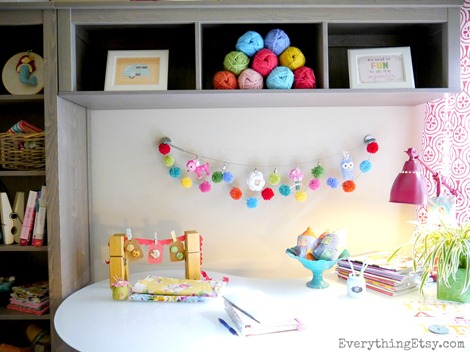
And while we are talking about studio work, boy howdy does mine need some... I am so jealous of artists and crafters with gorgeous studios like Kim's (on Everything Etsy)


and this one from housetohome.co.uk:


and this one from thehouseofsmiths:


It looks as though I need to start with some white furniture! I'll see if I can't work on that. Well it is Sunday night and I need to do more laundry and clean the kitchen, so I'm checking out for now. Enjoy! Hope you'll visit again soon. 

MamaZuzi

Monday, July 29, 2013

Mama Monday - Christmas in July

It is July ... for a couple more days. 

My shop has items on a "Christmas in July" sale ... for a couple more days. 

Christmas (as well as Hannukah and other winter holidays) are all about 6 months away. 

Time to get ready! 

I would be going gangbusters on this right now and would be, if I wasn't pretty darn sure I caught my daughter's stomach bug. 

But before crawling into bed, I did manage to create a few holiday themed images I hope to turn into photo card sets, signs, maybe canvas possibilities and other fun new ideas as well. 


Are you an early holiday shopper or do you wait until the last minute? 


Thursday, July 25, 2013

Thankful Thursday - Last Thursday Redux Edition

I am thankful for many things this Thursday. Of course I am thankful for my family and friends and for getting through the rough spots and moving forward. 

I am also thankful to have a good job and the ability to pursue my creative passions too. I am thankful for being able to do Last Thursday in Portland for a second time and this time with my co-worker Dana! 

Check out her cute items on Etsy:  

https://www.etsy.com/shop/LittleBreadcrumbPdx

Stop by and see us if you can tonight! This morning I'm having to pack up for tonight's event as I won't have time to come home first... table (in van), chair and sale items, square, smart phone... what else? Hmmm... maybe I should make a checklist for this sort of thing. 

I will be doing "the reveal" of my mini canvas pieces as they are ready. They are all places in Oregon. Here is Shaniko: 
So tiny! Loving it. Now I'm gonna go attempt to get ready for work AND possibly finish up one or more of my tiny little canvas babies! Ciao for now.

Wednesday, July 24, 2013

What a "bunch of shots" Wednesday!

Here is a partial reveal from yesterday's tutorial! 

I have removed some of the paper and you can begin to get the idea of what they'll look like, but I've got to go to my office and can't complete until later tonight. When I do, I hope to share! 
This miniature collection is all about Oregon. Can you tell me where these locations are?

Tuesday, July 23, 2013

Tutorial Tuesday - Photo Canvas Laser Printer on Paper Method

I have seen many different ways to put photos onto a canvas. 

I put my purple power photo onto a canvas before by mounting a photo print directly to the canvas and then using Hodge Podge and paint to give it texture and a bit of a canvas art feel. I was happy to sell this to someone who loved it as much as I did at last month's (and my first) Last Thursday in Portland! 


With a Miniature show coming up at Side Street Gallery, I was moving forward with several small photo canvases with this same method when I realized there was a different way that I wanted to try! Thanks to Ilene over at the "Come on Ilene" blog for sharing your wonderfully simple tutorial:  Make Your Own Canvas Prints. I followed her directions last night and came up with this new version of "Purple Power": 


So if you want to give this a try, I might suggest starting small and working your way to larger sizes of canvas when you get comfortable with the technique. Right now I'm specifically making ones that are small (mostly 2.5" x 3.5"). 

You will need: 

  • Blank canvas
  • Photo printed with a laser printer on regular paper
  • Gel medium
  • Water spray bottle
  • Foam paint brush
  • Option sponge
If you aren't a fan of mess, then you should probably cover your work space with a garbage bag (as Ilene suggests) or newspaper or wax paper. Then take your canvas and give it a thick coating of gel medium (I got mine at a local art store called Blick's). I would say thick but not TOO thick otherwise in my brief experience, I end up with more air bubbles to push out and glue oozing out the sides. 

Make sure you have cut your image down to the size of your canvas (or maybe just a bit smaller on all sides). When you print, maybe SURE you reverse your image if you want it to appear correctly once you've transferred it to canvas. I made this mistake last night and think I've learned my lesson. Gently place your image photo side down onto the gel on the canvas and then carefully push out all air bubbles and make sure your image is flat on your canvas. 

Let your project dry for 5 hours to overnight. Then the fun begins! 

Fill your spray bottle with water. Spray your canvas until the paper is saturated and give it a few minutes to soak in. Then you want to start gently rubbing the paper off with your fingers. Be especially careful around key elements of your image so that they don't get rubbed off -- such as faces. You will probably have to do this step multiple times until your image is completely paper free. 

When you are satisfied with your image (and lack of paper on it), allow your canvas to dry thoroughly. Give it a final coat of gel medium and voila -- you have a gorgeous photo canvas! 

Unfortunately for you (or me maybe) all of my little canvases are down in my studio drying for a few more hours before I can finish and share with you. Maybe tomorrow on "What a Shot" Wednesday! Stay tuned.